Film photography has made a strong comeback in recent years, with many photographers exploring creative techniques to enhance their images. One of the most interesting and widely discussed methods in analog photography is pushing and pulling film. This technique allows photographers to adjust exposure and development to achieve unique visual results.
Understanding pushing and pulling film can help photographers gain more control over their images, especially in challenging lighting conditions. Whether someone is shooting in low light or aiming for a softer tonal range, learning how to push and pull film can significantly improve photographic outcomes.
This guide explains the concept, techniques, and practical examples so that photographers can better understand what is pushing and pulling film and how it affects image quality.
What Is Pushing and Pulling Film?
Before diving into techniques, it helps to understand push-and-pull film meaning in simple terms.
In film photography, pushing and pulling refer to changing the film’s exposure index and then adjusting development time to compensate.
- Pushing film means shooting the film at a higher ISO than its rated speed and extending development time.
- Pulling film means shooting the film at a lower ISO and reducing development time.
Essentially, push and pull film processing allows photographers to manipulate brightness, contrast, and grain by altering both exposure and development. This method is commonly used in push and pull film photography to achieve creative effects or adapt to difficult lighting situations.
Many beginners searching online often ask what is pushing and pulling film, and the answer lies in this balance between exposure and development adjustments.
Understanding Push/Pull Film Development
To better understand this technique, it is important to look at push-pull film development.
When a photographer decides to push film, they deliberately underexpose it during shooting and then compensate during development by increasing development time. Conversely, pulling film involves overexposing slightly and reducing development time to maintain balance.
In simple terms, the push pull film development meaning refers to altering the chemical processing time of the film to match the adjusted exposure used during shooting.
This method has been used for decades by professional photographers who want more flexibility when shooting film.
Pushing vs Pulling Film
A common question among photographers is about pushing vs pulling film and how they differ in practical use.
Pushing Film
- Used when shooting in low light
- Produces higher contrast
- Increases visible grain
- Allows shooting with faster effective ISO
For example, pushing film 2 stops means that a film rated at ISO 400 is shot as if it were ISO 1600. The development time is then extended to compensate.
Pulling Film
- Used in bright condition
- Produces softer contrast
- Preserves highlight details
- Creates smoother tonal transitions
Both techniques serve different creative purposes, which is why photographers often experiment with them depending on their desired look.
What Is Pulling Film?
Many photographers also ask specifically what is pulling film.
Pulling film occurs when the photographer intentionally overexposes the film slightly and then shortens development time. This reduces contrast and often results in smoother images with more highlight detail.
A related question that often arises is whether pulling film overexposing. Technically, yes – pulling film involves a controlled form of overexposure combined with reduced development to balance the image.
This technique is commonly used in portrait photography and scenes with strong lighting.
Examples of Pushing and Pulling Film
Looking at real-world examples helps illustrate how these techniques affect final images.
Pushed Film Examples
Some pushed-film examples include the following:
- Street photography shot at night
- Indoor concerts
- Documentary photography in low-light environments
These images often feature higher contrast and more noticeable grain, which many photographers find visually appealing.
Many creators also demonstrate pushing film – YouTube tutorials where they show side-by-side comparisons of normal and pushed film results.
Pulling Film Examples
On the other hand, pulling film examples often appears in situations such as the following:
- Bright outdoor portraits
- High-contrast midday scenes
- Landscapes with strong sunlight
Pulling helps reduce harsh contrast and produces more balanced images.
Tools That Help With Pushing and Pulling Film
Photographers often use resources to calculate development changes when adjusting film speed.
Two popular tools include the following:
Pushing and Pulling Film Calculator
A push/pull film calculator helps determine how much development time should be increased or decreased based on exposure adjustments.
This tool simplifies the process, especially for beginners who are learning how development times affect final images.
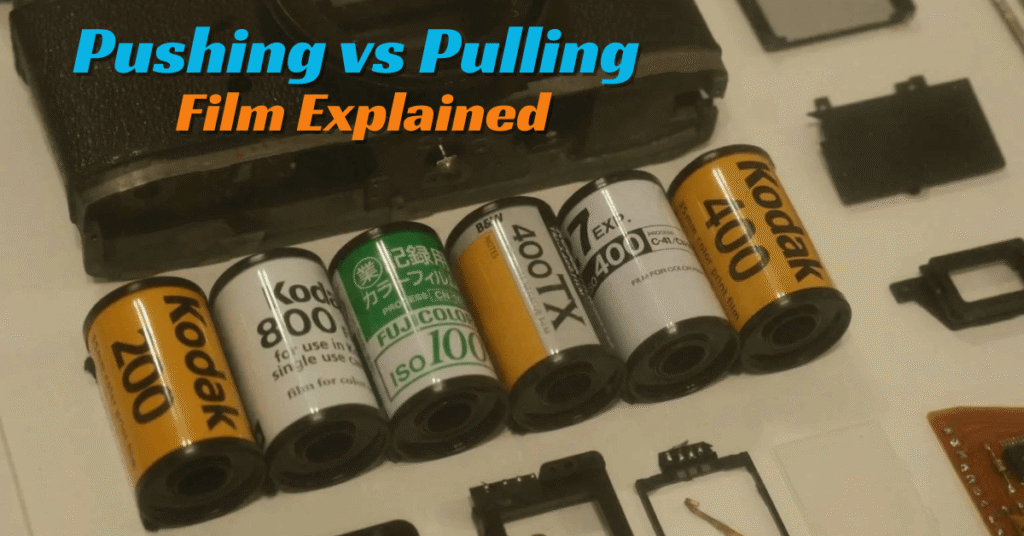
Pushing and Pulling Film Chart
Another helpful resource is a push-and-pull film chart. These charts list recommended development times for different film stocks when pushing or pulling by one or more stops.
Using these charts can prevent mistakes and ensure consistent results when experimenting with film.
Is Pushing or Pulling Easier?
A common beginner question is whether pushing or pulling is easier.
Generally, pushing film is considered easier because many film stocks handle underexposure and extended development relatively well. Pulling film requires more precise exposure control, especially in bright lighting.
However, both techniques become easier with practice and experimentation.
Many photographers share their experiences online, including discussions about pushing and pulling film on Reddit, where users compare results and discuss different film stocks.
Why Photographers Use Pushing and Pulling Film Techniques
There are several reasons why photographers use push and pull film methods.
1. Shooting in Low Light
Pushing film allows photographers to capture images in darker environments without using flash.
2. Creative Grain and Contrast
Some photographers intentionally push film to create a gritty, high-contrast look.
3. Highlight Control
Pulling film helps maintain highlight detail in very bright scenes.
4. Film Stock Flexibility
These techniques allow photographers to adapt a single film stock to multiple lighting conditions.
Because of this flexibility, pushing and pulling film remains one of the most useful techniques in analog photography.
Tips for Beginners Trying Push and Pull Film
For photographers experimenting with push and pull film photography, a few simple tips can help achieve better results.
Start With One Stop
Beginners should start by pushing or pulling only one stop before attempting more extreme adjustments.
Keep Notes
Recording exposure settings and development changes helps photographers learn what works best.
Choose Flexible Film Stocks
Some films respond better to pushing and pulling than others.
Communicate With Your Lab
If using a film lab, photographers should clearly specify the required push and pull film processing instructions.
Common Mistakes When Pushing and Pulling Film
Even experienced photographers sometimes encounter problems when experimenting with film development.
Some common mistakes include:
- Pushing film too many stops
- Forgetting to adjust development time
- Incorrect exposure metering
- Using film stocks that do not respond well to pushing
Avoiding these mistakes helps ensure consistent results when learning push-pull film development.
FAQs
What are the three types of film?
The three most common types of photographic film are:
- Black and white film
- Color negative film
- Slide film (also known as reversal film)
Each type reacts differently when pushing or pulling, which is why testing different films can be useful.
Should you push or pull old film?
Many photographers choose to push expired film because aging film often loses sensitivity over time. Pushing can help compensate for that loss, although results may vary depending on storage conditions.
Does pulling film increase grain?
No, pulling film usually reduces the appearance of grain because development time is shortened. Grain typically becomes more noticeable when film is pushed.
What is a pull in cinematography?
In cinematography, a pull can refer to adjusting exposure or focus during filming. In film processing terms, pulling means reducing development time after intentionally overexposing the film.
Conclusion
Film photography offers endless opportunities for creative experimentation, and pushing and pulling film is one of the most powerful techniques photographers can learn.
By understanding push and pull film processing, photographers gain more flexibility in different lighting situations while also achieving distinctive visual styles. Whether someone is exploring pushing film 2 stops for dramatic grain or experimenting with softer tones through pulling, this method adds a valuable tool to any analog photographer’s workflow.
With resources such as a push/pull film calculator, a push-and-pull film chart, and real-world inspiration from pushed film examples, photographers can confidently explore the creative possibilities of film development.
As interest in analog photography continues to grow, mastering the art of pushing and pulling film remains an essential skill for anyone passionate about the art of shooting film.